how I diagnosed and repaired a seized engine
I heard of a seized engine and hoped never to experience one. And then my luck ran out. Not really a matter of luck as carelessness. At the Atlanta house I use a chipper/shredder for branches and foliage en route to the compost heap. The shredder has functioned flawlessly since 2000, except for one bearing which was easily replaced.
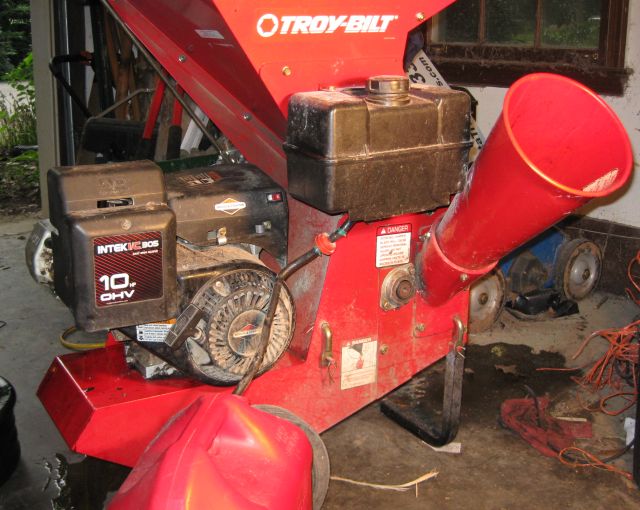
I regularly checked the oil level – by positioning the machine on level ground, removing the oil plug and ensuring the oil was level with the lowest threads for the oil plug.
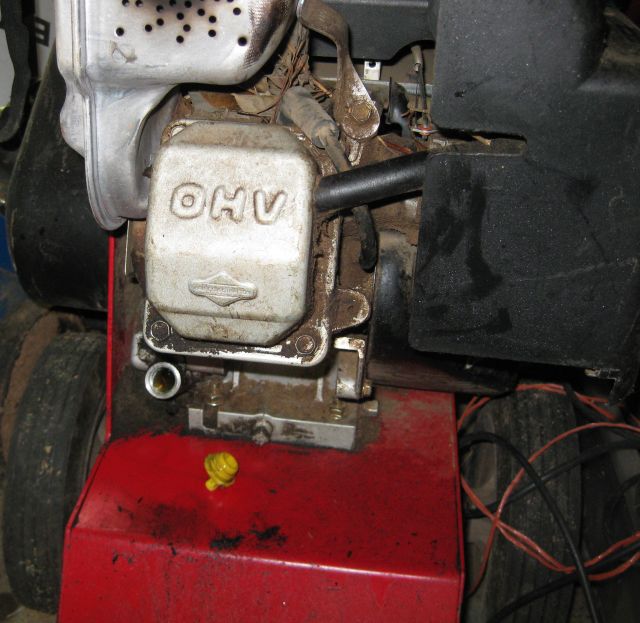
And then one morning, while chipping away, something unusual happened – the engine puttered out. I thought it was short of gas but there was gas enough. I tried cranking it by pulling the starter rope and it turned easily – too easily. I assumed either the rope was not turning the engine – a quick check told me it was, or that the engine had lost compression. And then I noticed that the yellow oil plug was missing. And surmised that as I was operating the machine it had dislodged the oil plug, pumped out all its oil through the oil plug hole and then became a seized engine. Initially I hoped that the valves (there are two one for intake and one for exhaust) had stuck in the open position and this was why there was no compression.
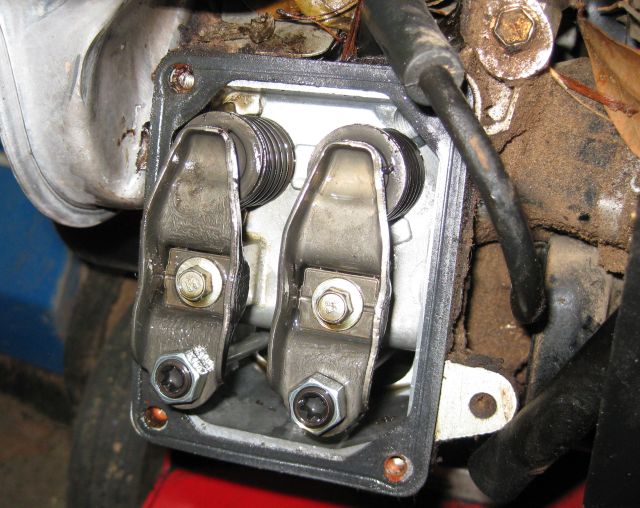
But the valves were fine, so it had to be the piston. I removed the spark plug and inserted a pencil through the spark plug hole and found the piston. I pushed down on the pencil and the piston slid down the cylinder. So, good news – the piston was not seized/melted onto the cylinder and bad news, the rod which connects the piston to the crankshaft was broken. I had a seized engine.
Next step – 3 options: a) trash the chipper – it had given me many years service and I could transport branches to my farm and use my large tractor driven chipper; b) buy a replacement engine – cost approx $350 before transport costs; c) fix the engine. I opted for (c).
Disassembly
Relatively straight forward to remove the engine from the chipper frame.
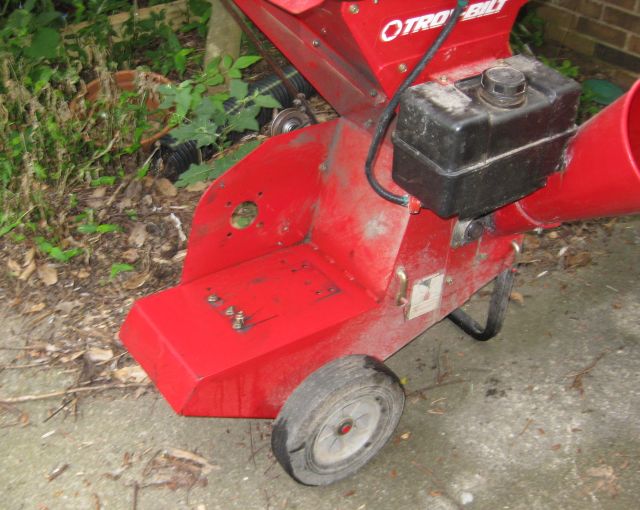
I took the engine with me to my farm – something to do in the basement during the middle of the hot summer days.
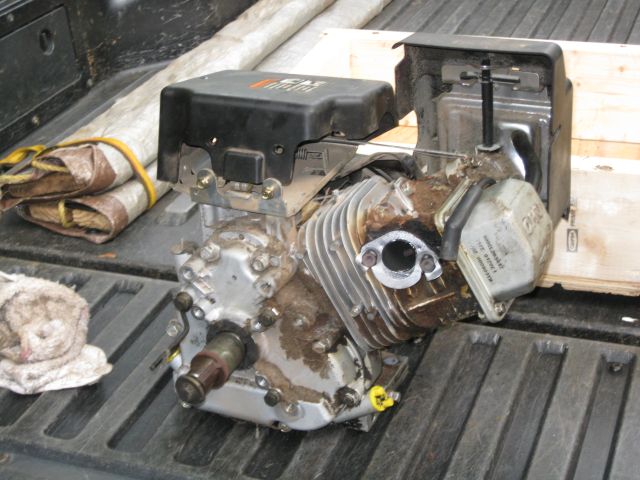
Also straightforward to disassemble the engine. I rethreaded screws and washers where possible to minimize the conjecturing effort required during assembly trying to figure what goes where.
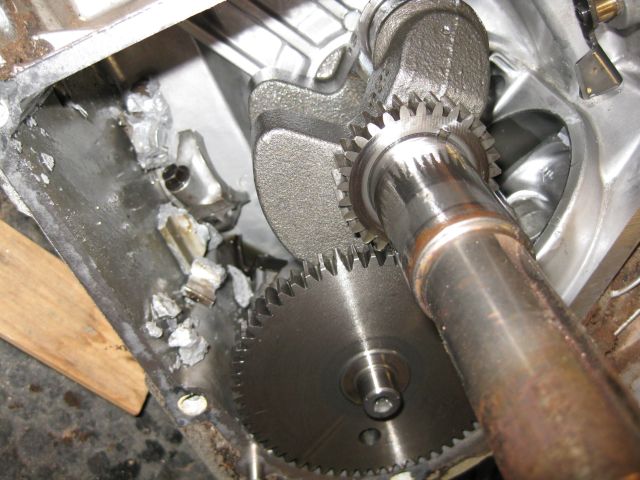
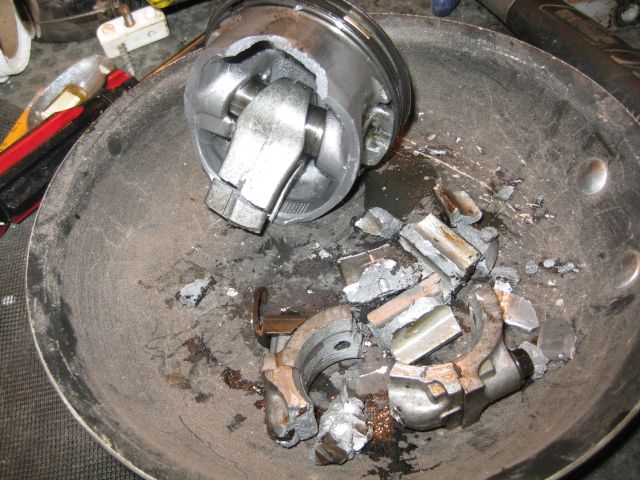
It appeared that with my seized engine the piston rod disintegrated – parts of the aluminum rod were melted onto the crankshaft journal. I removed the piston and felt the interior of the cylinder. No noticeable scoring – phew – minimal damage for a seized engine, so all I had to do was buy a new rod, new piston and rings and gaskets and sand the fragments off the crankshaft journal. I thought the replacement parts would be inexpensive, but they cost in total approx $90 from the cheapest internet supplier.
I scoured the internet and found a free downloadable workshop manual for Briggs Stratton engines including my model. This was immensely helpful for all the subsequent procedures.
The piston assembly came with piston rings, which have to be fitted, but no piston pin bearing which is the pin which connects the rod to the piston. So I removed the pin from the damaged piston and I then connected the rod to the piston using this pin, ensuring that the arrow on the piston pointed toward the “mag” on the rod as directed by the manual.
Next step was to install the piston rings. There are 3 grooves. On the bottom grove goes the oil control ring and on each side of it, two thin rains. The center ring goes into the middle groove. It has two paint stripes and they are installed with the stripes to the right of the ring gap. Finally the top ring is installed in the top groove of the piston. It has one stripe which is installed with the stripe to the right of the ring gap. A friend lent me his ring compressor – it was a simple matter to tighten the rings with the ring compressor and insert the piston with the rings into the cylinder.
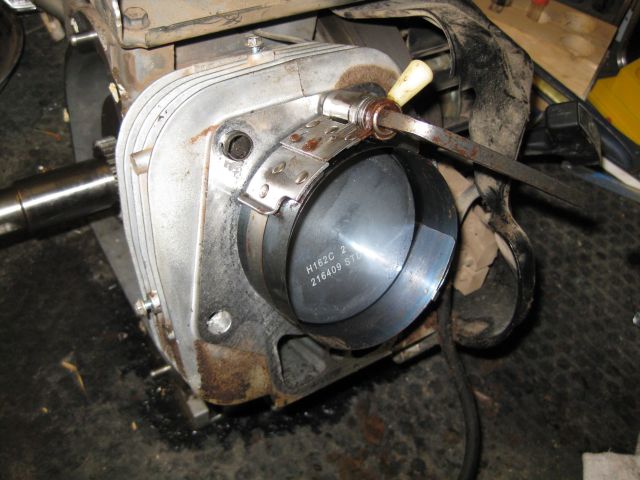
Connecting the rod to the journal
The torque specs for the connecting rods is 100lb-in and my 0.5” torque wrench only goes down to 20lb-ft which is the equivalent of 240 lb-in (multiply by 12). So I have to pause my rebuild until I have acquired a 0.25” torque wrench which is calibrated for 100lb-in. At my favorite internet shopping site I surveyed the 0.25” torque wrenches available. There are expensive wrenches costing more than $100 and presumably these are superior to the <$40 wrenches. I am hopeful that I will not have to repair too many engines and so, after reading numerous reviews I purchased the new model Tekton, which arrived quickly and appears well made and up to the task.
My plan is to secure the bolts into their threads using loctite which is a special glue made for this purpose. I have learned from bitter experience that for important tasks I should do a trial run first – so instead of applying the glue to the threads and then torquing each bolt to 100 lb-in, I first torqued the bolts without the glue. At 100 lb-in the piston wouldn’t move. So I backed off the torque to 50 lb-in and the piston still wouldn’t move. I concluded that the sanding I had previously done was insufficient and there was still a coating of the aluminum from the rod cap on the crankpin journal. So this meant a lot more sanding.
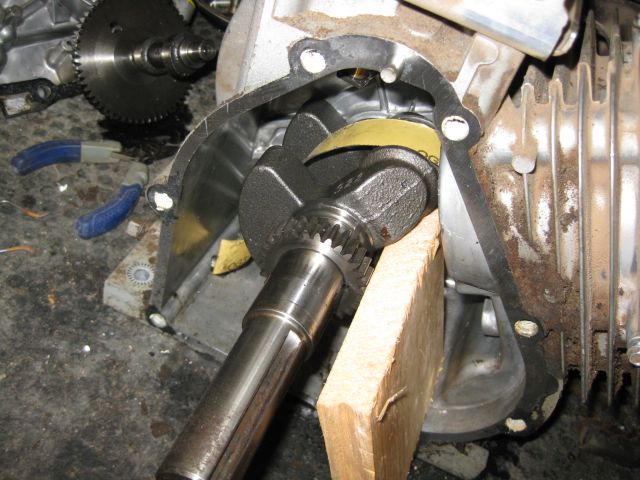
I figured out how to sand the journal effectively without removing the assembly from the block – I sanded with my hands pulling the sandpaper down and with the journal in four different positions 90 deg, 180 deg, 270 deg and 360 deg, initially with 180 grit paper until there was no aluminum residue and then with 220 grit and finally 340 grit. I retorqued the rod cap bolts to 100 lb-in and the piston moves, so after this detour I can move forward again rehabilitating the seized engine.
Valve grinding
Since I have dismantled the engine and the engine was used for more than 12 years it seems appropriate and convenient to regrind the valves. I first removed the rockers which blocked access to the valves and their springs. The difficult bit is releasing the valve stem from the spring which holds it tight against the cylinder head. I have a valve spring compressor but it is really meant for car engines where there is more space to use it and the car springs are stronger. So after maneuvering unsuccessfully with the valve spring compressor, I simply pressed down with my thumbs on the valve spring retainer and removed the two retainer rings (actually one hurtled across the room and was eventually located). I applied some valve grinding compound onto the valve and using an old valve grinder from my London days, rotated each valve quickly back and forth in its seat.
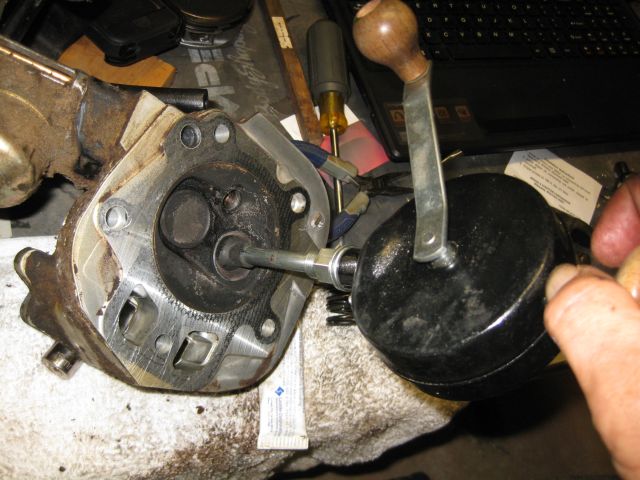
Then I compressed the springs and reinserted the retainers.
So, with the repair work done it was just a matter of assembling the engine following the torquing specs in the manual, and then attaching the engine to the chipper and starting it up. It started immediately but there was a problem – the engine was racing. A whole new field for study – how the governor works.
The throttle on the carburettor is held in the open position by a spring. Open position means there is no obstruction to air entering the carburettor which means the engine goes faster. But if the engine goes too fast it will be damaged. You only want to open the throttle when the engine is under load such as chipping. So the governor is a clever device – as the engine speeds up, centrifugal weights slide outward and their motion via linkages counteracts the pull of the spring. When the engine is chipping it slows down, the centrifugal weights slide inward, the governor ceases to oppose the spring and the engine speeds up. It took me some time to figure this out and how to correctly set the governor. My repair of a seized engine is concluded, the chipper runs fine for now – the real test will be for how long.

I have the exact same chipper… model # 47321 is what is on the machine, plus it has the round branch orofice as opposed to the square one. I bought the machine which looks as though it has hardly been used… but, upon inspection, there is NO OIL in the crankcase. I’ve located a new 12 HP engine from “Harbor Freight” but I am concerned that, like most of what they sell, the engine may not be long on quality? I am looking for a 10-18 HP engine that I can transplant.. AND, I plan to rebuild the chipper-shredder wheel and install a 2nd cutter blade like the 2015 models. I will also install new “flangs”? Thanks for your posting… I’ve been looking but until I read your article..? The photos you’ve included could be of my machine… like I said, mine = new? there is NO paint missing from the shredder shute. Thanks for the article! It was well-written and easy to understand.
David
Glad it was helpful and good luck with your repair. My cutter blade needs attention and I may follow your suggestion.
Wow! You, sir, are one helluva American crafstman of the Old School. Here I am this December 20, 2015 with a suddenly “seized” Troy-Bilt Chipper 47286, which we bought virtually unused, in 2014.
Fired it up initially; ran and drove beautifully for one-hour test. Never got around to using it until now. Your post (written in an excellent, down-to-earth style) provides excellent detail for at least what to look for in troubleshooting our Troy-Bilt. Let us hope our problem isn’t yours.
Well, back outside and into the breach.
Best regards and wishes to you this Christmas and New Year.
Thank you for your kind words. I hope you are able to fix your chipper. I have used mine regularly since the 2013 repair and it still functions fine.