Which seed to use
I have a multistep process for germinating vegetable seeds. In this summary I focus on tomato seed to tomato plants using soil blocks.
Select the seed – I rarely use all the seed in the packet and so I store the remaining seed in airtight packets, labeled with date of purchase, in the cooler temperatures of the basement. I keep notes of all my growing activities and in late winter I decide which seed brought forward from the prior year I will use and what seed I will purchase. I typically grow 6 different varieties of tomatoes of which half are heirloom and half hybrid with disease resistance properties.
Determine the seeding date – I obtain average last frost date for my area from the internet and use planting date calendars from the internet to decide on the start date for seeding.
Seed into mini soilblocks
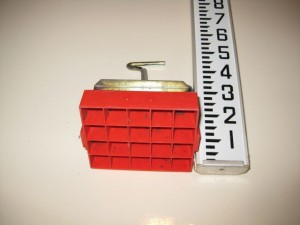
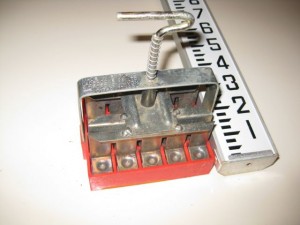
Begin with 3/4” blocks – I have a mini 20 soil blocker which makes a frame of 20 3/4” blocks at a time. I can fit 10 such frames in my 11” by 21” seeding tray – which means 200 seeds can be germinated at a time in each tray. I start with 10 seeds for each tomato variety = 60 blocks, so I will dedicate 3 frames to tomatoes. I purchase the seed starting mix or growing medium, moisten it in a tray and using the soil blocker produce the frames of small soil blocks in the seeding tray. Each seeding tray has an identifying alphabetical number and one of the long sides of the tray is notated every 2”.
Transfer seed to the blocks – If the soil blocks have just been made they are already moist, if not they are moistened by trickling water along the bottom of the tray. The water rises into the blocks. I make an opening on the top of each block with a sharpened pencil or jeweler’s screwdriver. Then the moistened tip of a pencil accurately picks up and locates a seed into the opening previously made in each block. I sketch on paper the outline of the tray, its identifying #, the location of each frame and record which variety of seed has been placed in each half of the frame blocks. This is done concurrently with the transfer of the seeds to the blocks.
Seed incubation
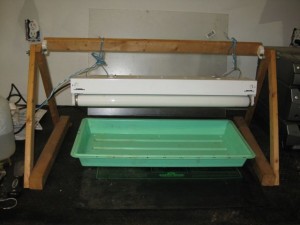
Incubation – an easily readable thermometer (such as used in refrigerators) is placed in the tray, a plastic pane covers 60% of the top of the tray (if more than 60% of the tray is covered the temperature may exceed 100 deg F), and the tray is placed on a seedling heating mat. For the first few days the tray is covered with light blocking material (cardboard, newspaper etc). After the seed has germinated the tray is exposed to light – either indirect sunlight or light from a fluorescent tube.
Monitoring – progress is monitored daily to ensure temperatures are not too high, that the tray is not too wet or too dry and to check on how the seedlings are developing.
Seed into larger soilblocks
Relocation of seedlings – a few days after the seeds have germinated and before the seedlings are too large, they must be relocated to larger 2” blocks.
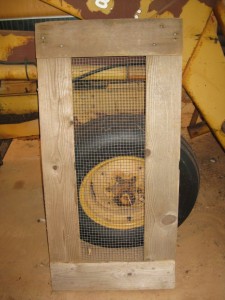
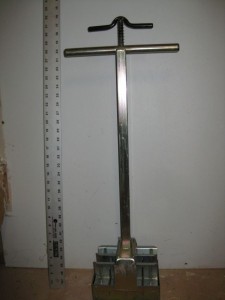
Preparation of 2” blocks – my recipe for the soil mix is 2 parts compost; 2 parts spagnum peat; 1 part sharp building sand and half part dolmitic lime. The compost and peat are screened – I built a simple 2’ by 2’ frame with 4” by 2” untreated wood and stapled it with fine chicken wire which screens out the larger particles. I hand pick any remaining large particles and then thoroughly mix the ingredients in a concrete mixing trough. The mix is then thoroughly moistened and compressed into 12 4” blocks using a large soil blocker.
If the mix is adequately moistened the blocker will retain the mix while it is lifted and transferred to the seed tray. If the mix is too wet some of the blocks will slop out. If the mix is too little moistened, when the blocks are ejected some will not retain their square shapes. A 3/4” insert is fitted into each of the 12 block moulds so each block has a 3/4” cavity at the top into which the 3/4” seed blocks are planted.
Relocation of seedlings – the 3/4” seed blocks are delicate – they are best transferred when relatively dry, and more easily transferred with tongs purchased at a supermarket. With aviation snips I cut the width of the tongs to 3/4” so the tong accurately grasps individual 3/4” seed blocks and deposits them accurately into the 3/4” cavity in the top of each 2” block.
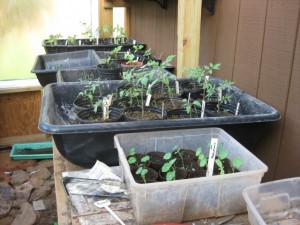
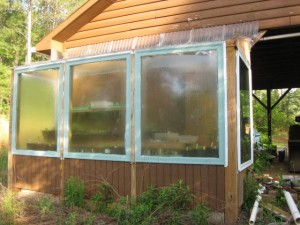
Care of 2” blocks – the 2” blocks are stored in alphabetically numbered seed trays in the greenhouse.
Because soil blocks have 5 of their 6 surfaces exposed they lose moisture quickly and must be re-watered every day. Rather than water from the top, which degrades the block structure, I gently fill the bottom of the tray with water and the water migrates to and up the block.
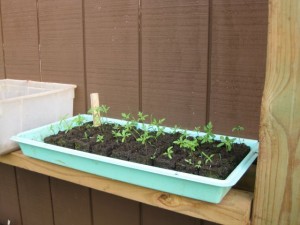
In good conditions, the seedlings grow rapidly and, when fully sized for the block, I then transfer them to individual 1 gallon pots (mix half compost half ordinary soil) where they grow larger.
When the plant is decently sized and outdoor conditions favorable, the plant is transplanted outdoors.
Pros and Cons of Soil blocks for growing seed – the disadvantage of soil blocks has been mentioned – they lose moisture rapidly since all the surfaces except for the bottom surface are exposed to air. Daily watering obviates this problem. The advantages of soil blocks for seed are many – it is easier to track and identify seed varieties when they are in blocks; the roots of the plant grow to the block edges and usually stop growing (“air pruning”) and, most importantly, when soil blocks are transplanted all the roots in the block are transplanted as well, so there is less transplant shock and the plant adapts more quickly to its new surroundings.
